軟體燒錄請參考前一篇文章:在Raspberry Pi 5 8GB主機板安裝Home Assistant
WiFi設定:Day16 - Home Assistant安裝
使用Respberry Pi Imager燒錄:haos_rpi3-64-15.0.rc1.img.xz
主要是在已燒錄Home Assistant OS的SD Card中hassos-boot目錄下,添加新的目錄以及檔案:
CONFIG/network/my-network.txt「智慧生活科技專業社群」由 Nantou.py 使用者社群與國立虎尾科技大學電機資訊學院共同維護,匯集關注Python、人工智慧、物聯網與智慧生活應用的教師、學生及實務工作者。本社群以「科技融入生活、教學連結場域、知識促進共好」為核心,分享Python程式設計、AI協作學習、AIoT、網際網路與雲端服務、智慧農業、福祉科技、永續發展及USR社會實踐等內容,並將技術導入課堂、社區與真實生活場域。部分文章運用生成式AI協助資料整理、內容架構、程式範例與文字潤飾,文章主題、場域經驗、內容查核及最終修訂則由作者與社群成員負責。我們期待透過人與AI協作,讓科技成為改善生活、連結世代、支持地方與實踐永續的力量。
軟體燒錄請參考前一篇文章:在Raspberry Pi 5 8GB主機板安裝Home Assistant
WiFi設定:Day16 - Home Assistant安裝
使用Respberry Pi Imager燒錄:haos_rpi3-64-15.0.rc1.img.xz
主要是在已燒錄Home Assistant OS的SD Card中hassos-boot目錄下,添加新的目錄以及檔案:
CONFIG/network/my-network.txt1 2 3 4 5 6 7 8 9 10 11 12 13 14 15 16 17 18 19 20 21 22 23 24 25 26 27 28 29 30 31 32 33 34 35 36 37 38 39 40 41 42 43 | views:
- path: default_view
title: Home
cards:
- type: entities
entities:
- person.nfu_demo
- type: entities
entities:
- light.bed_room_light
- light.live_room_light
title: Light
- type: entities
entities:
- switch.bed_room_switch
- switch.live_room_switch
title: Switch
- show_name: true
show_icon: true
type: button
entity: binary_sensor.windows_contact
tap_action:
action: toggle
- type: iframe
url: https://www.nfu.edu.tw
aspect_ratio: 100%
title: 國立虎尾科技大學
- camera_view: auto
type: picture-glance
image: https://demo.home-assistant.io/stub_config/kitchen.png
entities:
- sensor.sun_next_dawn
- sensor.sun_next_dusk
camera_image: camera.camera1
title: 樹莓派
- camera_view: auto
type: picture-glance
title: 尚虎雲
image: https://demo.home-assistant.io/stub_config/kitchen.png
entities:
- sensor.sun_next_midnight
- sensor.sun_next_noon
camera_image: camera.camera2
|
畫面:
開關:
安裝File editor和Mosquitto。
安裝MQTT
# Loads default set of integrations. Do not remove. default_config: # Load frontend themes from the themes folder frontend: themes: !include_dir_merge_named themes automation: !include automations.yaml script: !include scripts.yaml scene: !include scenes.yaml mqtt: - light: - name: Bed room light command_topic: "bed_room/light" - name: Live room light command_topic: "live_room/light" - switch: - name: Bed room switch command_topic: "bed_room/switch" - name: Live room switch command_topic: "live_room/switch" - binary_sensor: - name: Windows contact state_topic: "home-assistant/window/contact" value_template: "{%if is_state(entity_id,\"on\")-%}OFF{%-else-%}ON{%-endif%}"
- id: '1739746357824' alias: bed light turn on description: '' triggers: - trigger: state entity_id: - switch.bed_room_switch from: 'off' to: 'on' conditions: [] actions: - action: light.turn_on metadata: {} data: {} target: entity_id: light.bed_room_light mode: single - id: '1739746513220' alias: bed light turn off description: '' triggers: - trigger: state entity_id: - switch.bed_room_switch from: 'on' to: 'off' conditions: [] actions: - action: light.turn_off metadata: {} data: {} target: entity_id: light.bed_room_light mode: single
上一篇文章:在Home Assistant上,實現MQTT Light的功能
本篇延續上一篇文章,以下是實作當太陽下山就點亮電燈的步驟。
1.請點選設定(Settings),再選擇自動化和情境(Automations & Scenes)。
2.選擇右下方的建立自動化(CREATE AUTOMATION)。
3.建立新的自動化(Create new automation)。
4.選擇新增觸發器(ADD TRIGER)。
5.輸入sun,並選擇sun。
6.選擇Sunset,並設定在太陽下山前半小時點亮,再選擇新增行動(ADD ACTION)。
7.選擇Light。
8.選擇Turn on。
9. 選擇實體(Choose entity)。
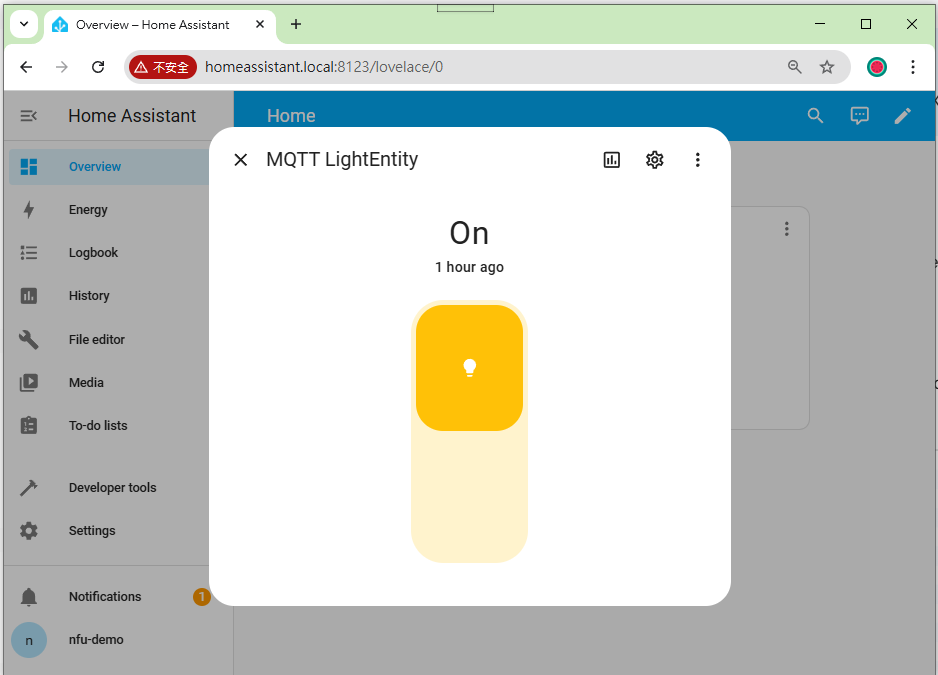
10. 選擇MQTT LightEntity。
11.選擇存檔
執行畫面:
1.點選Settings後再選Add-ons,然後選右下方的Add-on Store,最後選擇安裝Mosqutto broker。
2.選擇安裝按鈕(INSTALL),安裝Mosquitto broker。
3.安裝完成
樹莓派上安裝居家助理(Home Assistant)的文章:
本篇文章將在居家助理上安裝兩個常用的工具,分別是檔案編輯工具(File editor)和網路分享工具(Samba share)。
1.選擇Settings,再點選Add-ons。