上圖是Android官方網站介紹如何在手機上利用HTML, CSS等網頁技術來設計Web APPs,最簡單的方法和傳統的PC瀏覽網頁一樣,使用一般的網頁設計,把網頁放在伺服器上,然後利用瀏覽器來閱讀,如上圖左邊方式。今天我們要來討論的是如何整合網頁及Android APP,如上圖右邊的方式,這種方式有一種讓人期待和創新的設計。
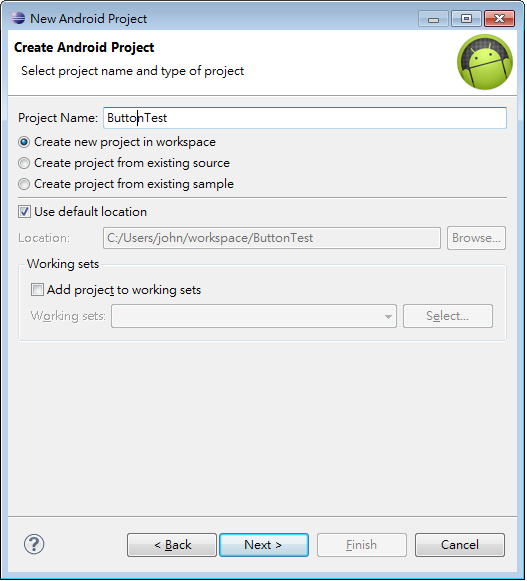
1. 先建立一個專案
2. 刪除TextView,新增WebView
3. 修改程式
package com.example.webtest;
import android.os.Bundle;
import android.app.Activity;
import android.webkit.WebSettings;
import android.webkit.WebView;
public class MainActivity
extends Activity {
WebView web;
@Override
public void onCreate(Bundle
savedInstanceState) {
super.onCreate(savedInstanceState);
setContentView(R.layout.activity_main);
web
= (WebView)
findViewById(R.id.webView1);
WebSettings webSettings
= web.getSettings();
webSettings.setJavaScriptEnabled(true);
web.loadUrl("file:///mnt/sdcard/test.html");
web.addJavascriptInterface(new
JavaScriptInterface(this),
"Android");
}
}
4. 新增JavaScriptInterface.java,並加入下列程式。
package com.example.webtest;
import android.content.Context;
import android.widget.Toast;
public class JavaScriptInterface {
Context mContext;
/** Instantiate the interface and set the context */
JavaScriptInterface(Context
c) {
mContext
= c;
}
/** Show a toast from the web page */
public void showToast(String
toast) {
Toast.makeText(mContext,
toast, Toast.LENGTH_SHORT).show();
}
}
5. 在AndroidManifest.xml檔中加入Internet使用權限。
6.用記事本編輯,並儲存為test.html
Test/title></span></p>
<p style="margin-top: 4.8pt; margin-bottom: 0pt; margin-left: 0in; text-indent: 0in; direction: ltr; unicode-bidi: embed; word-break: normal; "><span style="font-family: Calibri; "><body>Hello World</span></p>
<p style="margin-top: 4.8pt; margin-bottom: 0pt; margin-left: 0in; text-indent: 0in; direction: ltr; unicode-bidi: embed; word-break: normal; "><span style="font-family: Calibri; "><input type="button"
value="Say hello" </span><span style="font-family: Calibri; ">onClick</span><span style="font-family: Calibri; ">="</span><span style="font-family: Calibri; ">showAndroidToast</span><span style="font-family: Calibri; ">('Hello
Android!')" /></span></p>
<p style="margin-top: 4.8pt; margin-bottom: 0pt; margin-left: 0in; text-indent: 0in; direction: ltr; unicode-bidi: embed; word-break: normal; "></p>
<p style="margin-top: 4.8pt; margin-bottom: 0pt; margin-left: 0in; text-indent: 0in; direction: ltr; unicode-bidi: embed; word-break: normal; "><span style="font-family: Calibri; "><script type="text/</span><span style="font-family: Calibri; ">javascript</span><span style="font-family: Calibri; ">"></span></p>
<p style="margin-top: 4.8pt; margin-bottom: 0pt; margin-left: 0in; text-indent: 0in; direction: ltr; unicode-bidi: embed; word-break: normal; "><span style="font-family: Calibri; ">
function </span><span style="font-family: Calibri; ">showAndroidToast</span><span style="font-family: Calibri; ">(toast)
{</span></p>
<p style="margin-top: 4.8pt; margin-bottom: 0pt; margin-left: 0in; text-indent: 0in; direction: ltr; unicode-bidi: embed; word-break: normal; "><span style="font-family: Calibri; ">
</span><span style="font-family: Calibri; ">Android.showToast</span><span style="font-family: Calibri; ">(toast);</span></p>
<p style="margin-top: 4.8pt; margin-bottom: 0pt; margin-left: 0in; text-indent: 0in; direction: ltr; unicode-bidi: embed; word-break: normal; "><span style="font-family: Calibri; ">
}</span></p>
<p style="margin-top: 4.8pt; margin-bottom: 0pt; margin-left: 0in; text-indent: 0in; direction: ltr; unicode-bidi: embed; word-break: normal; "><span style="font-family: Calibri; "></script></span></p>
<p style="margin-top: 4.8pt; margin-bottom: 0pt; margin-left: 0in; text-indent: 0in; direction: ltr; unicode-bidi: embed; word-break: normal; "><span style="font-family: Calibri; "></body></span></p>
<p style="margin-top: 4.8pt; margin-bottom: 0pt; margin-left: 0in; text-indent: 0in; direction: ltr; unicode-bidi: embed; word-break: normal; "><span style="font-family: Calibri; "></html></span></p><p style="margin-top: 4.8pt; margin-bottom: 0pt; margin-left: 0in; text-indent: 0in; direction: ltr; unicode-bidi: embed; word-break: normal; "><span style="font-family: Calibri; ">7.利用DDMS</span><span style="background-color: white; font-family: 新細明體; ">開啟</span><span style="background-color: white; font-family: Calibri; ">File
explorer</span><span style="background-color: white; font-family: 新細明體; ">在</span><span style="background-color: white; font-family: Calibri; ">sdcard</span><span style="background-color: white; font-family: 新細明體; ">上放</span><span style="background-color: white; font-family: Calibri; ">test.html</span><span style="background-color: white; font-family: 新細明體; ">檔案。</span></p><p class="separator" style="text-align: center; clear: both; "><a imageanchor="1" href="https://blogger.googleusercontent.com/img/b/R29vZ2xl/AVvXsEjv1GTN14kMO_ZWsCgRNVAjne9YOdXsxlWHnT1lDYxEX3gcepLZNQFViBH4tG6uvZC5XYwjx8iFtqa-TE4nz6U068xJommb6yj7YVp7Rg04cnqhBnYBxE7zyVGdXPHGSvWZ1y8Bqn3BXvkz/s1600/web4.png" style="margin-left: 1em; margin-right: 1em; "><img style="" src="https://blogger.googleusercontent.com/img/b/R29vZ2xl/AVvXsEjv1GTN14kMO_ZWsCgRNVAjne9YOdXsxlWHnT1lDYxEX3gcepLZNQFViBH4tG6uvZC5XYwjx8iFtqa-TE4nz6U068xJommb6yj7YVp7Rg04cnqhBnYBxE7zyVGdXPHGSvWZ1y8Bqn3BXvkz/s320/web4.png" border="0" width="320" height="272"></a></p><p class="separator" style="text-align: left;clear: both; ">8. 執行結果</p><p class="separator" style="text-align: center; clear: both; "><a imageanchor="1" href="https://blogger.googleusercontent.com/img/b/R29vZ2xl/AVvXsEgO1OtNxeYa6GsYhWCXTPYytIO7qVhTp1E97M5_nY-QdEq5O86OLweskw9U2M95WZ_1zFf5EkC1Kc1BZ8hhAVd4x-ICUWHHpHAoELNKtzeGZHTcNDImrRZ8cETQtVUkszmr2s_nkLmd9YwB/s1600/web5.png" style="margin-left: 1em; margin-right: 1em; "><img style="" src="https://blogger.googleusercontent.com/img/b/R29vZ2xl/AVvXsEgO1OtNxeYa6GsYhWCXTPYytIO7qVhTp1E97M5_nY-QdEq5O86OLweskw9U2M95WZ_1zFf5EkC1Kc1BZ8hhAVd4x-ICUWHHpHAoELNKtzeGZHTcNDImrRZ8cETQtVUkszmr2s_nkLmd9YwB/s320/web5.png" border="0" width="191" height="320"></a></p><p class="separator" style="text-align: left;clear: both; "><br></p><p style="margin-top: 4.8pt; margin-bottom: 0pt; margin-left: 0in; text-indent: 0in; direction: ltr; unicode-bidi: embed; word-break: normal; "><span style="background-color: white; font-family: 新細明體; "><br></span></p><p></p><div><br></div>